
Photo by Stephen Phillips - Hostreviews.co.uk on Unsplash
Add SSL to your AWS EC2 Node.js backend giving it a subdomain


Table of contents
Hosting is one of thran ine most haunting task for a developer. With all the expertie in development, you never know the kind of errors you might ran into by not properly deploying your code. Hosting can be tough especially with the lack of resources or the knowledge of it. We will try to get behind the hosting steps to figure out a way to secure your hosted EC2 backend along with giving it a subdomain. Let's start with it.
Problem Statement
Suppose that you have deployed your backend on an AWS instance at an IP xx.xx.xx.xx, port pp and the URL to access your backend is xx.xx.xx.xx:pp (Notice the http and not https in the URL, eg - http://192.168.0.0:2000 ). You have hosted your frontend at any other service with a URL example.com. Now, by convention http and https requests can't communicate in modern browsers until you accept your browser to go in insecure mode. So the problem is to convert xx.xx.xx.xx:pp into api.example.com because you want a more meaningful endpoint while coding ahead.
Assumptions and Pre-requisites
Your backend and frontend is working perfectly on insecure channels like localhost.
You have example.com domain bought from any of the service provider, we will use GoDaddy for this article, but any other domain provider will work just fine.
Your backend is hosted on AWS EC2 instance. We are scoping it for EC2 in this article.
Solution Steps
Install Nginx
To get the SSL working, we need to first setup Nginx server. To do that open the terminal of aws, enter into ssh instance (ssh ubuntu@xx.xx.xx.xx) and install Nginx package
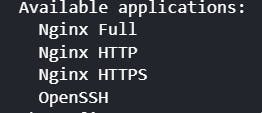
sudo apt-get install nginxAs Nginx registers itself under firewalls, you can check its installation by
sudo ufw app listOutput:
Enable Nginx
Allow the permissions to nginx full and openssh to act as firewalls. You can do this by writing
 sudo ufw allow 22/tcp
 sudo ufw allow 'nginx full'
After installing Nginx, you must enable it. First of all, check if the firewall is enabled by typing
sudo ufw statusThere are two cases - active/inactive.
If ufw is inactive, enable the ufw by using
sudo ufw enableIf ufw is active, reload the ufw
sudo ufw reloadAfter this Check the status of ufw by
sudo ufw statusand it should output something like

Install certbot
After allowing nginx the access for your backend application, install certbot to generate a free SSL certifcate on your system.
sudo apt install certbot python3-certbot-nginxGet the subdomain
Now, go to the domain provider (GoDaddy in this case) and go to Manage DNS -> Add an A record -> Type your subdomain (Here, api) in Name column and Your Ip (i.e. xx.xx.xx.xx) without http in the value. As soon as the A record is created, you will have a subdomain api.example.com accessible to you.
Generate Certificate
Generate the SSL certificate using certbot on EC2 instance by typing the command
sudo certbot --nginx -d api.example.comYou will get an option of whether you want to redirect http calls or not, select 2 (i.e. to redirect http calls to https) and move ahead. You will have your certificate generated.
Create Reverse Proxy
After generating the certificate, the only thing left is to create a reverse proxy because nginx works at port 80 and your application might be working at any other port, say 8080 for example. So inside your ssh session go to the default sites-available file in nginx by typing
sudo nano /etc/nginx/sites-available/defaultIt opens the editor with the default file. Add the following piece of code in the file
 server{
 server_name api.example.com;

 location / {
                 # First attempt to serve request as file, then
                 # as directory, then fall back to displaying a 404.
                 proxy_pass http://xx.xx.xx.xx:8080;
         proxy_http_version 1.1;
         proxy_set_header Upgrade $http_upgrade;
         proxy_set_header Connection 'upgrade';
         proxy_set_header Host $host;
         proxy_cache_bypass $http_upgrade;
         }
 }
Leave all other parts as it is. That's it, api.example.com should now be up and running.
Note - There are multiple ways to achieve the SSL with subdomain and every method works just fine. I ahve explained something that I tried and worked.
Thank you for reading through, looking forward to hear your feedback.